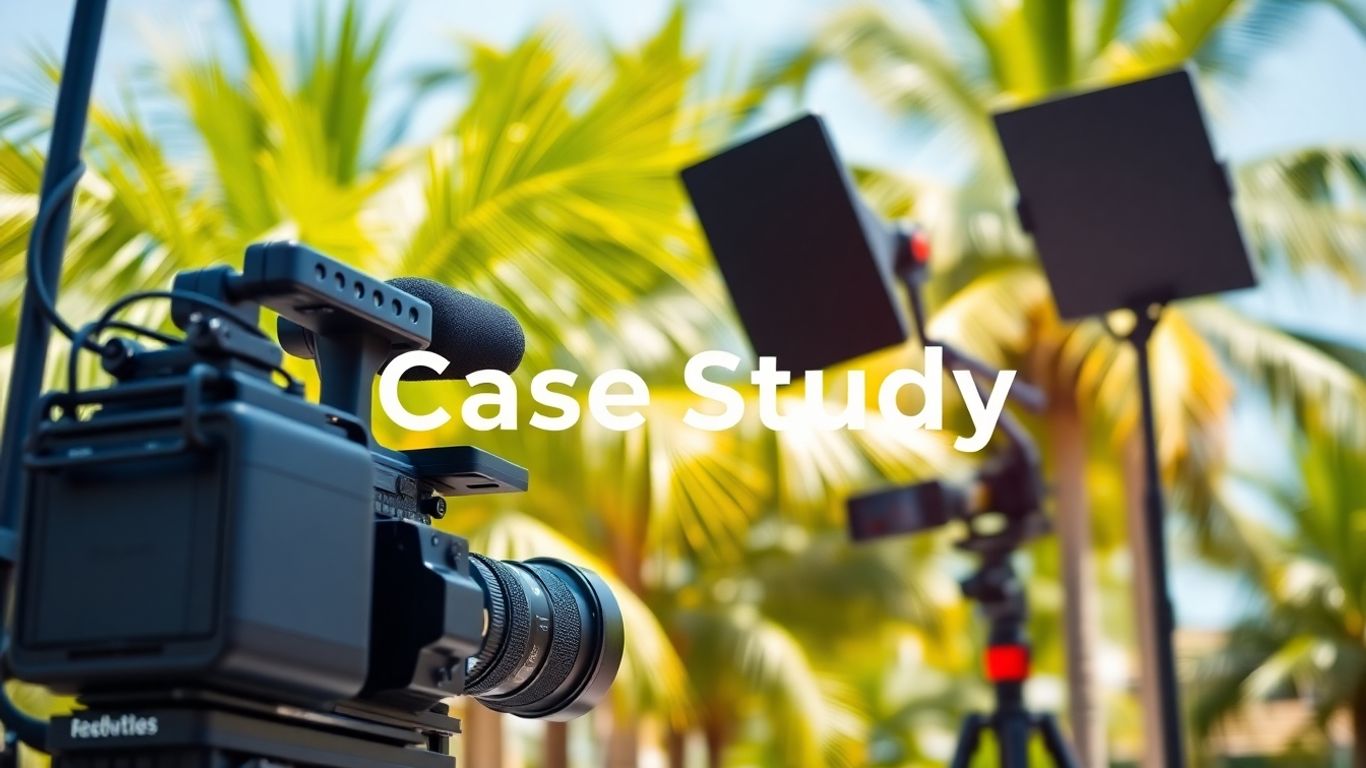
Creating a solid video case study is a great way to show off what your business can do. It’s not just about filming happy customers; it’s about telling a real story that connects with people. This guide breaks down how to make that happen, from planning the shoot to getting it seen. We’ll cover the whole video case study production process so you can build trust and show off your successes effectively.
Key Takeaways
- Focus on authentic customer stories to build trust and credibility.
- Plan your video case study production carefully, including storyboarding and lighting.
- Ensure clear audio and consider professional voice-overs for a polished feel.
- Edit your footage strategically, integrating graphics to reinforce your brand message.
- Distribute your video case studies across relevant platforms to maximize reach and impact.
UNDERSTANDING THE POWER OF VIDEO CASE STUDIES
Video case studies are more than just a trend; they’re a powerful tool for building trust and showing potential clients what you can really do. Think about it: reading about success is one thing, but seeing and hearing it from a real customer? That’s a whole different level of convincing. It’s about showing, not just telling, how your product or service makes a difference.
THE STRATEGIC IMPERATIVE OF VIDEO CASE STUDIES
In today’s crowded market, standing out is tough. Video case studies offer a way to cut through the noise. They provide authentic proof of your claims, making your marketing efforts much more effective. Instead of just listing features, you’re showcasing real-world results. This approach helps potential customers visualize themselves benefiting from your solution.
BUILDING CREDIBILITY THROUGH AUTHENTIC STORIES
People connect with stories, especially when they’re real. Video allows you to capture the genuine voice and experience of a satisfied customer. Hearing directly from someone who faced similar challenges and found success with your help builds a strong sense of trust. It’s this authenticity that makes video case studies so effective at establishing credibility.
DRIVING ENGAGEMENT WITH COMPELLING NARRATIVES
Let’s face it, static text can only hold attention for so long. Video, on the other hand, is inherently more engaging. By combining visuals, audio, and a well-crafted narrative, you can create a compelling story that keeps viewers hooked. This increased engagement means your message is more likely to be remembered and acted upon. It’s a dynamic way to communicate value and drive interest in what you offer.
CRAFTING YOUR VIDEO CASE STUDY NARRATIVE
A compelling video case study doesn’t just happen; it’s built on a solid narrative foundation. Think of it like telling a really good story – you need a beginning, a middle, and an end that keeps people hooked. The goal here is to take a customer’s success and turn it into something relatable and inspiring for potential clients.
Identifying Compelling Customer Success Stories
Not every customer success story is a good fit for a video case study. You want stories that are clear, impactful, and showcase a significant positive change. Look for customers who experienced a real problem, found a solution with your product or service, and saw measurable results. It’s also helpful if they’re comfortable on camera and can speak genuinely about their experience. A good starting point is to review your customer feedback, sales win reports, and even support tickets to find those standout moments.
- Look for quantifiable results: Did your solution lead to a specific percentage increase in sales, a reduction in costs, or improved efficiency? Numbers make the story more concrete.
- Identify a clear problem/solution arc: The customer should have faced a distinct challenge that your offering directly addressed.
- Seek genuine enthusiasm: A customer who is truly happy and willing to share their positive experience will make for a much more authentic video.
- Consider industry relevance: Stories from customers in similar industries to your target audience often have the most impact.
Structuring the Story for Maximum Impact
Once you’ve picked a great story, how do you structure it so it flows well and keeps viewers engaged? A common and effective structure follows a simple pattern:
- Introduction: Briefly introduce the customer and the challenge they were facing before they found your solution. Set the scene.
- The Problem: Go into a bit more detail about the pain points and difficulties the customer experienced. This is where you build empathy.
- The Solution: Explain how your product or service was introduced and how it specifically addressed the identified problems. This is the turning point.
- The Results: This is the most important part. Showcase the positive outcomes and benefits the customer achieved. Use data and testimonials here. Quantifiable results are key to demonstrating value.
- The Future: Briefly touch on the customer’s ongoing success and their plans for the future, reinforcing the long-term impact of your solution.
Highlighting Key Challenges and Solutions
When you’re filming, you want to make sure the core of the story – the problem and the solution – really shines through. Don’t just state the challenge; show it. If a customer struggled with inefficient processes, describe what that looked like. Was it wasted time, errors, or missed opportunities? Then, when you introduce your solution, be specific about how it solved those exact issues. For instance, if your software automated a manual task, explain how that freed up the customer’s team. This direct link between problem and solution is what makes a case study persuasive. You can find great examples of how to frame these narratives in effective video scripts.
Focusing on the
PRODUCTION ESSENTIALS FOR VIDEO CASE STUDIES
Getting the production side of your video case study right is super important. It’s not just about pointing a camera and hitting record; there’s a bit more to it if you want it to look professional and actually hold people’s attention. Think of it like setting the stage for a play – the right setup makes all the difference.
PLANNING AND STORYBOARDING YOUR PRODUCTION
Before you even think about lights or cameras, you need a solid plan. This is where storyboarding comes in. It’s basically a visual roadmap for your video. You sketch out each scene, jotting down what will happen, what will be said, and how it will look. This helps you catch potential problems early and makes sure you don’t miss any key shots during filming. It also helps everyone on the production team, from the camera operator to the client being interviewed, understand what’s expected.
Here’s a simple way to approach it:
- Define the Core Message: What’s the one thing you want viewers to take away?
- Outline Key Scenes: Break down the story into manageable visual chunks.
- Shot List Creation: Detail every shot needed, including camera angles and movement.
- Location Scouting: Visit the filming location beforehand to check lighting and sound conditions.
- Talent Coordination: Confirm interview times and locations with your customer.
A well-thought-out storyboard acts as your blueprint, preventing costly mistakes and ensuring a smooth filming process. It’s the difference between a chaotic shoot and a focused, efficient one.
OPTIMIZING LIGHTING FOR PROFESSIONAL VISUALS
Good lighting can make or break a video. You want your subject to look clear and well-lit, not like they’re hiding in a dark corner. Natural light is often great, but you can’t always rely on it. Using simple lighting setups can make a huge difference. Think about a three-point lighting system: one light to illuminate the subject, another to soften shadows, and a third to create a rim light that separates them from the background. This gives your video a polished, professional feel.
Here’s a quick rundown of lighting basics:
- Key Light: The main light source, usually placed to the side of the subject.
- Fill Light: Softer light placed on the opposite side to reduce harsh shadows.
- Back/Rim Light: Placed behind the subject to create separation and depth.
CAMERA TECHNIQUES FOR ENGAGING FOOTAGE
How you shoot the video matters a lot. You don’t want everything to look like a static security camera feed. Varying your shots keeps the viewer interested. Mix in close-ups of the speaker, wider shots to show the environment, and maybe some B-roll footage – that’s extra footage like shots of the product in use or the office space – to illustrate what’s being discussed. Using a tripod or stabilizer is also key to avoid shaky footage, which can be really distracting. Smooth camera movements and varied shots make the final video much more dynamic and engaging.
THE ROLE OF AUDIO IN VIDEO CASE STUDIES
So, you’ve got your visuals all lined up, the story is solid, but what about the sound? Honestly, bad audio can sink even the best-looking video. It’s like watching a movie with the sound cutting in and out – super distracting and it just makes the whole thing feel unprofessional. Clear, crisp audio is non-negotiable for building trust and keeping viewers engaged.
Think about it: people will tolerate slightly less-than-perfect video quality if the audio is good. But if the sound is muffled, full of background noise, or just plain bad, they’re likely to click away. This is especially true for case studies where you’re trying to convey important information and build credibility. You want your customer’s story to be heard loud and clear, not lost in a sea of static.
ENSURING CLEAR AND CRISP AUDIO CAPTURE
Getting good audio starts at the source. You can’t really fix terrible audio in post-production, not without a lot of effort and often still with less-than-ideal results. So, what’s the game plan?
- Use quality microphones: Forget the built-in mic on your camera or phone. Invest in external microphones. Lavalier mics (those little clip-on ones) are great for interviews because they stay close to the speaker’s mouth. Shotgun mics, mounted on the camera or a boom pole, are good for capturing sound in a specific direction.
- Control the environment: Find a quiet space to record. Turn off any humming appliances, close windows, and ask people to keep noise down. Even small things like a ticking clock or a buzzing fluorescent light can be really noticeable.
- Monitor your audio: Always wear headphones while recording. This lets you hear exactly what the microphone is picking up and catch any issues in real-time. You can check for distortion, background noise, or if the levels are too low or too high.
- Do a sound check: Before you start rolling on the actual interview or narration, record a few seconds of test audio. Play it back through your headphones to make sure everything sounds right. This is a simple step that can save you a lot of headaches later.
USING MUSIC AND SOUND EFFECTS STRATEGICALLY
Once you’ve got your clean dialogue, you can think about adding music and sound effects. These aren’t just filler; they can really help tell the story and set the mood.
- Background music: Choose music that complements the tone of your case study. Is it an inspiring success story? Maybe something uplifting. Is it about overcoming a tough challenge? Perhaps something more dramatic or determined. Keep the volume low enough so it doesn’t overpower the spoken words. You don’t want it to be a distraction.
- Sound effects (SFX): Use SFX sparingly and purposefully. A subtle sound effect can emphasize a point or add a bit of polish. For example, a gentle ‘whoosh’ when a graphic appears or a subtle ‘ding’ when a key statistic is shown. Overdoing it, though, can make your video feel cheesy.
THE IMPACT OF PROFESSIONAL VOICE-OVERS
Sometimes, you might need a voice-over to narrate the story, explain complex points, or bridge gaps between different parts of the case study. This is where a professional voice-over artist can make a huge difference.
A professional voice-over artist brings a level of polish and clarity that’s hard to achieve otherwise. They understand pacing, tone, and how to deliver a message in a way that connects with the audience. It adds a layer of credibility and makes the entire production feel more high-end. Think about how much more impactful a well-delivered narration is compared to someone just reading a script awkwardly.
When you’re looking at the overall quality of your video case study, don’t underestimate the power of good audio. It’s a huge part of how viewers perceive the professionalism and trustworthiness of your brand. Making sure your sound is on point is just as important as getting those great shots. It’s all part of creating a compelling narrative that truly showcases customer success. Remember, people listen with their eyes, but they feel with their ears.
EDITING AND POST-PRODUCTION FOR IMPACT

So, you’ve got all this great footage from your customer interviews and product shots. Now comes the part where you actually make it all come together into something watchable and, more importantly, persuasive. This is where editing and post-production really shine, turning raw clips into a polished story.
Selecting the Best Footage for Your Story
This is where you become a bit of a detective, sifting through hours of footage to find those golden nuggets. You’re looking for authentic reactions, clear explanations, and moments that really capture the essence of the customer’s experience. Think about the narrative arc you want to create – what are the key points you need to hit? Sometimes the most powerful moments aren’t perfectly scripted; they’re the genuine, unscripted bits that show real emotion. It’s about picking clips that not only sound good but also look good, fitting the overall mood and message you’re aiming for. Don’t be afraid to cut anything that doesn’t serve the story, even if it was a great soundbite on its own.
Integrating Graphics and Text Overlays
Graphics and text overlays are your secret weapons for clarity and emphasis. You can use them to highlight key statistics, customer names, company logos, or even just to reinforce a particularly important point the customer is making. Think about what information the viewer absolutely needs to see. For instance, when a customer mentions a specific metric, like a 40% increase in efficiency, displaying that number on screen makes it instantly digestible and memorable. It’s also a great way to add a bit of visual interest and break up longer talking segments. Just remember to keep it clean and on-brand; too much clutter can be distracting. A good rule of thumb is to use them to support the narrative, not to overpower it. You can see how important data is in these case studies, like the one detailing revenue growth.
Reflecting Brand Voice and Messaging
This is the final polish. The editing style, music choice, and even the pacing should all align with your brand’s overall voice. Are you a serious, data-driven company, or are you more playful and approachable? Your video case study needs to feel like it came from you. This means choosing background music that fits the tone, ensuring any added voice-overs match your brand’s personality, and making sure the final message reinforces your core value proposition. It’s about creating a cohesive experience that builds trust and reinforces who you are as a company. If your brand is all about being direct and authentic, the editing should reflect that – no overly slick or artificial-looking transitions. The goal is to make the customer’s story feel like a natural extension of your brand’s own narrative.
DISTRIBUTING AND AMPLIFYING YOUR VIDEO CASE STUDIES
So, you’ve put in the work, filmed a killer video case study, and it’s looking good. Now what? Just putting it on your website and hoping for the best isn’t really a plan, is it? You need to get it in front of the right eyes and make sure it actually does some work for you. Think of it like making a great movie – you wouldn’t just release it without a marketing push, right?
OPTIMIZING FOR VARIOUS DIGITAL PLATFORMS
Each platform has its own vibe and best practices. You can’t just upload the same video everywhere and expect magic. For instance, YouTube loves longer, more detailed content, while LinkedIn and Instagram often do better with shorter, punchier clips. Think about where your target audience hangs out. Are they scrolling through TikTok, checking industry news on LinkedIn, or watching tutorials on YouTube? Tailor your video’s format and accompanying text to fit. Maybe you cut a 30-second highlight reel for social media and use the full 3-minute version on your website or YouTube channel. It’s all about meeting people where they are.
LEVERAGING VIDEO CASE STUDIES IN SALES FUNNELS
These videos are gold for sales teams. They can be used at different stages of the buyer’s journey. Imagine a prospect is just starting to research a problem. A video case study showing how a similar company solved that problem can be incredibly persuasive. Later, when they’re comparing solutions, a video highlighting your specific results can tip the scales. Your sales team should have easy access to these videos and know exactly when and how to deploy them. Think about embedding them in follow-up emails or having them ready during demo calls. It adds a layer of proof that just talking can’t match. We’ve seen companies grow from $16M to $63M in revenue by effectively using these kinds of success stories.
MEASURING THE ROI OF VIDEO CASE STUDY PRODUCTION
How do you know if all this effort is paying off? You need to track things. Look at website traffic coming from your video content, how long people are watching, and if they’re taking the next step – like requesting a demo or downloading a resource. You can also ask new customers how they found you; if they mention a specific video, that’s a direct win. Tracking conversion rates from prospects who watched a case study versus those who didn’t can also show its impact. It’s about connecting the video back to actual business results, like increased leads or closed deals. A good starting point is to look at how your marketing efforts contribute to revenue, aiming for at least a 3:1 return on marketing investment.
Once your video case studies are ready, it’s time to get them seen! Sharing your success stories widely is key to attracting new customers. Think about where your potential clients hang out online and make sure your videos are there. Don’t just post and forget; actively promote them on social media, in email newsletters, and on your website. Ready to make your video case studies work harder for you? Visit our website today to learn how!
Putting It All Together
So, we’ve seen how video case studies can really make a difference. They’re not just fancy videos; they’re powerful tools that show what a company can actually do. When you’ve got real numbers, like the ones we looked at – showing huge jumps in traffic, better sales, and a stronger bottom line – it just makes sense. People want to see proof, and video case studies deliver that proof in a way that’s easy to understand and trust. It’s about showing, not just telling, and that’s what builds real credibility.
Frequently Asked Questions
What makes a good customer story for a video case study?
A great story shows a real problem a customer had and how your product or service helped them solve it. It’s best when the customer sounds excited and can share specific good things that happened because of your help, like saving time or making more money. Think about showing a clear ‘before’ and ‘after’ picture.
How long should a video case study be?
Shorter is usually better to keep people watching! Aim for videos that are between 1 to 3 minutes long. This is usually enough time to tell the story without losing the viewer’s attention. You can always make a longer version if needed, but start with a concise one.
Do I need fancy equipment to make a video case study?
Not at all! While professional gear helps, you can make a great video with just a smartphone, good lighting, and clear audio. The most important things are the story itself and making sure the customer sounds clear and believable. Good sound is often more important than perfect video quality.
How do I get customers to agree to be in a video case study?
Start by asking customers who have had really positive experiences with your product or service. Explain clearly what the video will be about and how it will help others. Offer them something in return, like a small thank you gift or featuring their business, which can help them feel appreciated.
What’s the best way to use video case studies once they’re made?
You can share them on your website, social media pages, and in email newsletters. Sales teams can also use them during presentations to show potential customers how you’ve helped others. Putting them where potential customers are looking is key to getting them seen.
How do I make sure the video case study sounds professional?
Focus on clear audio! Use a good microphone if possible, and film in a quiet place. If the customer’s voice is hard to hear or full of background noise, it can make the whole video seem less professional. Sometimes, adding background music or a narrator can also help make it sound polished.

Travis
https://blog.revoasis.comTravis Bjorklund, the marketing and growth genius behind RevOasis, brings over a decade of experience in technology and SaaS industries to the table. A staunch advocate of data-driven decision-making, he believes that the blend of technology and human intellect is the cornerstone of business success. His remarkable track record includes transformative roles in leading companies like Stran and SwagUp, where he pioneered revenue growth through innovative marketing strategies. At RevOasis, Travis focuses on helping businesses break through growth plateaus by deploying tailored, data-backed strategies and offering inspirational leadership guidance.